This post contains affiliate links. Which means I will make a commission at no extra cost to you should you click through and make a purchase. Read the full disclosure here.
Are you trying to decide how to add a Contact Form to your WordPress site? Overwhelmed with all the different plugins that you could use, but it feels like you are adding plugin after plugin?
I’ve been there. Setting up Individual Obligation from scratch. Feeling like I needed an endless list of plugins just to add all the features I thought my website should have. Articles for the ‘Best Plugins’ and ‘Plugins You Need’ are plentiful. Which can leave you feeling like you need them all.
Well, you don’t! I had to learn this the long way.
Sometimes you need to rethink how you use plugins. Some plugins can combine several features into one place.
Did you know that JetPack has some obscured features that you might not even know about? One of which is a Contact Form! So if you already use JetPack for some of its other features like security, related content, social sharing. Or the site verification codes for Search Engines and Pinterest. Then it might be the perfect solution to add a Contact Form to your site. Without adding yet another plugin.
Let’s discover how to activate this hidden feature. And what ways you can customise it to your needs!


Is JetPack’s Contact Form Enabled On WordPress?
In all new installs the Contact Form is enabled by default. Though, if you are like me. You may have had JetPack installed for a while already. In which case it might not be enabled.
If you are unsure whether it is enabled or not. You can check by creating or editing a Post.
What you should see below the Permalink is Add Contact Form.

If you can see this button in the Post Editor then you are enabled and ready to go. Feel free to skip below to How To Add JetPack’s Contact Form To A Page Or Post.
If it’s not there, then you need to enable it. The section below will show you have to do this. It’s super easy and won’t take long!
How To Activate JetPack’s WordPress Contact Form
A bunch of features in JetPack are enabled by default with new installs. Some of which won’t show up in the Settings because of this.
You might be curious what the full scope of features are. It also might surprise you what some of these are.
The best way to see an overview of all the features or ‘modules’, as JetPack likes to call them, is to go to your JetPack’s Modules page. The simplest way to get to the page is to paste the below URL into your browser:
www.[Your-Home-page-URL]/wp-admin/admin.php?page=jetpack_modules
Make sure you replace [Your-Home-page-URL] with the URL of your website. For example for this blog, I would use individualobligation.com
Surprised by the number of Modules? I know I was!
Feel free to explore these new found settings. But for the purpose of this post, I will only be focusing on the Contact Form.
Find Contact Form in the list.

Once you have found it, hover your mouse cursor over it.

Activate will appear on the righthand side. Click it and wait a moment.
The page will refresh and there should now be a solid blue line on the lefthand side of Contact Form. This means the plugin is active.
You should now see the Add Contact Form button in the Post Editor screen that was previously missing.
How To Add JetPack’s Contact Form To A Page Or Post
Using the Visual Editor
Open the Visual Editor for a new Post or Page, or edit one previously made.
Click inside the Visual Editor where you want the Contact Form to start.
Next, click the Add Contact Form button. Or the Contact block under Jetpack in the Gutenberg editor.
The default form from JetPack will be inserted.

Click on the Contact Form.
A Pencil and Cross icon will appear near the top.

Click the Pencil icon.
Options to customise the form will appear.
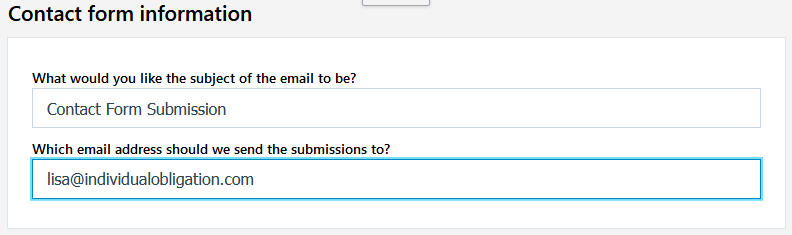
The first 2 options let you set the:
- Email Subject Line
- Email To
Next, you can customise the fields that appear on the Contact Form.
You can name the field using the Field Label, set a Field Type and toggle if the field is Required? Or not.

Remove any unwanted fields by clicking the cross in the righthand corner of their box.
Reorder your fields by clicking and dragging near their outer borders.
To add more fields go to the bottom of the Options box and click Add Field.

Once you’ve made all the changes you would like you can click on Update Form to save them.
Using The Text Editor or Code
To do any further customisation you can edit the Shortcode.
Switch to the Text view in the Editor. Or click More Options > Edit as HTML if you are using WordPress Gutenberg.
You’ll see a Shortcode for your Contact Form that looks like this:
contact-form to="[email protected]" subject="Contact Form Submission"][contact-field label="Name" type="name" required="1"][contact-field label="Email" type="email" required="1"][contact-field label="Website" type="url"][contact-field label="Message" type="textarea"][/contact-form]
Changing The Submit Button Text
To customise the text of the Submit button you will need to add the below code to your Shortcode after the opening contact-form text:
submit_button_text='Your submit button text goes here.'
The final code will look something like this:
contact-form submit_button_text='Your submit button text goes here.' to="[email protected]" subject="Contact Form Submission"][contact-field label="Name" type="name" required="1"][contact-field label="Email" type="email" required="1"][contact-field label="Website" type="url"][contact-field label="Message" type="textarea"][/contact-form]
Where To Find Responses Submitted Through The Form
Any information submitted through JetPack’s Contact Form will be sent through to the email address set up in the options above. These can also be found inside the WordPress Admin menu through Feedback > Feedback.

How Do I Change What The JetPack Contact Form Looks Like?
By default your Contact Form will pickup the styles from your Theme. This is great if you want your Contact Form to fit in with your Theme without any coding.
If you want to customise the style completely, you will need to edit your CSS files.
What Are The Limitations Of Using JetPack’s WordPress Contact Form?
- You can only have 1 contact form per page.
- For more advanced features you’ll probably need a dedicated plugin.
- You’ll need to know CSS if you want to customise the styling.
- You’ll need to know more advanced coding to customise messages or redirects on submission.
Why Would Someone Want To Use This Over Other Plugins?
- The Contact Form is included in the free version. Along with many other modules.
- Automatic styling to fit your Theme.
- Easy customisation of fields and types.
- No need to add another plugin if you already use JetPack
- Even if you don’t already use JetPack it is a lightweight option, that is well coded and supported.
So there you have it! A way to add a Contact Form to your WordPress site using JetPack. A plugin that a lot of people use, with currently over 1 million active installs in May 2018. Yet not many people realise that it can add Contact Forms.
If you are looking for a simple Contact Form that fits with your Theme, then look no further. Make full use of the tools JetPack has to offer. And make it easier to avoid bloating your website with unnecessary plugins.
Will you be using JetPack to add a WordPress Contact Form to your site? If not what are you using instead and why? Is there anything you want JetPack to do but can’t?
If you found this blog post useful then please consider taking a few seconds to share it to your favorite social media platform!
hi, i have updated the above mentioned short code in wordpress
but the email is not going to the given address. can you please help?
Hey there,
Have you tried using the pencil icon to edit your contact form rather than using the code? Sometimes characters can be missed out when pasting some code.
Another thing you can try is to make sure you publish your updated contact form. As sometimes the preview version generated by WordPress for your blog post or page won’t be fully working the same way. Like it would do if it was live.
Let me know if anything doesn’t make sense or you need further help?