This post contains affiliate links. Which means I will make a commission at no extra cost to you should you click through and make a purchase. Read the full disclosure here.
Keeping your blog legal is a tricky learning curve when just starting a blog. One important aspect is making sure you have affiliate disclosures. Which need to be at the top of any blog post that includes affiliate links.
Sometimes you might even need to add a disclosure to the top of each blog post for other reasons. Like disclosing a sponsored post, for example.
But the problem with all these legal requirements for us bloggers. Is not just knowing what to do to stay legal. The how we do it, is also vital too.
After all, if you had to go back through every blog post you wrote. And add in a little affiliate disclosure at the top. It would probably take a lot of time. Even if you just copied and pasted it.
Well, that’s where this blog post comes in. As I’m going to cover several different ways on how to add an affiliate disclosure using WordPress. Including the advantages and disadvantages of them.
Before we get into the how. Let’s have a quick explanation of the what and why.


What Are Affiliate Disclosures & Why Are They Important?
Ever noticed the line of text at the top of many blog posts. That says something along the lines of how “the blog post contains affiliate links”. And that if you click on them, that “the blogger might be compensated at no extra cost to you”?
Well, that’s exactly what an affiliate disclosure is. And they are an important legal requirement. For all bloggers that use affiliate links in their blog posts. So that it is clear and transparent when we as bloggers are being compensated for our work. And how exactly.
What You Need To Know About Writing A Disclosure
Writing an affiliate disclosure can sound complex. And sure enough, there is more than one way to go about writing them. Which is why it is important to understand things like the FTC guidelines.
And if you prefer to see examples. Then this blog post by Simply Stacie has some really easy to understand examples. That you can use as a reference.
But before you create an affiliate disclosure. You need to create your policy documents first. As your disclosure needs to link back to it. Writing this can be daunting and plain ol’ boring. But if you are serious about blogging. Then this needs to be done!
So, if you haven’t done this yet, I recommend reading this post. As it is full of useful tips. Or getting professional templates from a lawyer blogger here.
Warning! Before following any of the below methods. Backup your WordPress blog! As some of these methods will require editing your core theme files. Which could break your blog if done incorrectly!
Using Copy & Paste Every Time You Want To Add Affiliate Disclosures
Okay, so the most common option you could use to add an affiliate disclosure to your WordPress blog posts. Is that you could have a copy of the text and link saved somewhere. That you could then just copy and paste each time.
This method requires no tools. But as I mentioned earlier. It is clunky, slow and repetitive. It also relies on you remembering to copy and paste the disclosure in when needed.
Which is why I ended up looking for better alternative solutions!
Using A Shortcode To Create Affiliate Disclosures
Using a shortcode could help you save some time. Since you only have to remember something short like [disclosure]. You also don’t have to go looking for your copy and paste files either.
You’ll also be glad to know. That this method will work in both the Classic and Gutenberg editors.
Firstly, for this method. Go to Appearance > Theme editor
Under Theme files on the right-hand side click on Theme functions (functions.php) file.
Then at the bottom of the file, like here:

Copy and paste the below code:
/* Custom affiliate disclosure shortcode */
function disclosure() {
    return "<p class='disclosure'>This post contains affiliate links. <a href='https://www.individualobligation.com/disclosures/'>Read the full disclosure here</a>.</p>";
}
add_shortcode( 'disclosure', 'disclosure' );
Change the URL to point to your disclosures page. You can also change the rest of the wording if you like.
Click Update file at the bottom to save your changes.
Now if you are using the Classic WordPress editor or even WordPress Gutenberg. You should be able to simply type [disclosure] wherever you want this shortcode snippet to appear!
Much to my surprise. You don’t even have to create a shortcode block. To enter your [disclosure] shortcode for it to work in the WordPress Gutenberg editor.
Just make sure you test it out with a quick preview. Before publishing to make sure everything is working first though!
How To Use A WordPress Gutenberg Reusable Block For Your Affiliate Disclosure
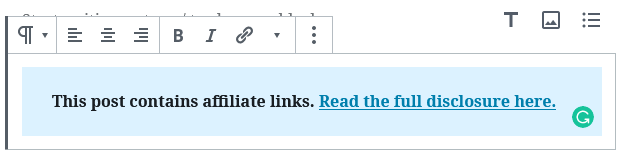
Another option, only available if you use the Gutenberg editor. Is that you could create a reusable block.
Simply create a regular paragraph block. Add in your text, a link to your policy page. And perhaps a background color to help separate it from the rest of the blog post. Like this:
You can then click on More Options for this Paragraph block and click Add To Reusable Blocks. Give it a memorable name and save it. Then whenever you add it to a blog post. It is all written and formatted for you. And what’s better. Is that if you decide to change the format, wording or link. It will update across all versions of this reusable block you’ve used throughout your blog posts. Cool, huh?
Again, the problem with this is that you have to remember to add in the reusable block. Every time you write a blog post that contains an affiliate link. But let’s be honest, as bloggers, we have too much to remember already. Without adding something like this on top of it all.
It also has the issue that it doesn’t apply backwards. So if you have say, 50+ blog posts you’ve written already. You’d have to go back and manually add the reusable block affiliate disclosure to each blog post. What a time sink!
Using Your Blog Post Tags To Automatically Trigger Your Affiliate Disclosures
Right, so the next option requires a little bit of editing your WordPress Theme. By adding some code. It’s a little scary. But should be easy to follow. Just make sure to backup your blog first.
If you are curious what the end result will look like. Before you go through the trouble of editing your WordPress Theme. Then here’s a quick screenshot below. Which shows the affiliate disclosure just below the social sharing buttons.

So, how do we get this result? Start off by going to Appearance > Theme editor. And on the right-hand side select the Theme functions (functions.php) file.
Scroll to the very bottom of this file and paste in the below code:
/* Add Affiliate Disclosure to Posts with the Tag Affiliate Only */
function disclosure_the_content( $content ) {
     if (is_singular('post') && has_tag( 'affiliate' )) {
         $custom_content = '<p class="disclosure"><i>This post contains affiliate links. <a href="https://www.individualobligation.com/disclosures/">Read the full disclosure here</a></i></p>';
         $custom_content .= $content;
         return $custom_content;
     } else {
         return $content;
         }
}
add_filter( 'the_content', 'disclosure_the_content' );
To customize this code for your own blog. You should change the “https://www.individualobligation.com/disclosures/”. To your policy page’s URL.
You can also customize the “This post contains affiliate links. ” and “Read the full disclosure here” text. To your own custom wording.
Once you’ve customized everything click Update File. And check the results on your blog.
So, how does this code work? Well, it will add in an affiliate disclosure to every blog post that you give the tag “affiliate”. The main problem with this is that although you can control the disclosure on a post by post basis. You still have to rely on yourself to remember to add the affiliate tag in the first place. Which could land you in trouble if you forget.
So, either add this step to your blog post checklist. Or I would strongly suggest using the following section instead. Which will show you how to add an affiliate disclosure to every blog post. That you can simply set and forget.
Also, if you would like to style the disclosure with different formatting using CSS. You can simply target the class=“disclosure”
How To Automatically Add An Affiliate Disclosure To Every Blog Post
Okay, so here’s how you can add an affiliate disclosure to every blog post that you won’t have to remember!
Remember how we added some code to the bottom of the functions.php file? Well, this is exactly the same here.
So, go into the Appearance > Theme editor from your WordPress Dashboard. And on the right-hand side select the Theme functions (functions.php) file.
Add the below code to the bottom of the file:
/* Add Affiliate Disclosure To All Posts */
function disclosure_the_content( $content ) {
    if (is_singular('post')) {
        $custom_content = '<p class="disclosure"><i>This post contains affiliate links. <a href="https://www.individualobligation.com/disclosures/">Read the full disclosure here</a></i></p>';
        $custom_content .= $content;
        return $custom_content;
    } else {
        return $content;
    }
}
add_filter( 'the_content', 'disclosure_the_content' );
Again, you’ll want to customize the URL in the code to your own policy page. And change the text wording depending on your needs.
How To Add Affiliate Disclosures Automatically To All Blog Posts With A Plugin
The above methods are how I would suggest adding affiliate disclosures to your blog posts. However, for those of you who would rather use a WordPress plugin. Or prefer not to edit code in your WordPress Theme files. I have an alternative you might be interested in 😉
Whilst there are many WordPress plugins out there. Finding one for affiliate disclosures is a little tricky. Simply searching for things like disclaimer or disclosure. Will likely lead to a handful of relevant plugins. Most of which aren’t very popular, well-supported or user-friendly.
Which is why I’m actually going to suggest something a bit different.
So, to start off for this method you’ll want to go and install the WordPress plugin called Ad Inserter.

Yep, that’s right. This WordPress plugin might have been designed for things like Google Ads. But it also makes a great affiliate disclosures plugin once you know how to set it up.
So, once you have it installed. Go to Settings > Ad Inserter from the WordPress dashboard.

On this screen, in the black box copy and paste the below code:
<p class="disclosure"><i>This post contains affiliate links. <a href="https://www.individualobligation.com/disclosures/">Read the full disclosure here</a>.</i></p>
Below the black box make sure the tick next to Posts is visible.
Change the Insertion to Before content.
And Alignment to Center or Left depending on your preferences.
Remember to customize the URL with your own policy page. Plus any other changes to the wording of the disclosure.

Then click Save All Settings.
If you then browse to your blog posts. You should see your affiliate disclosure appearing above your social media sharing buttons. Like this:

And if for any reason you want to disable this affiliate disclosure. Then you simply need to click the pause icon that is near the top right. And then click Save All Settings again.
It should turn red and look like this:

Adding An Affiliate Disclosure To Your Blog Post Is Easy With These WordPress Tutorials
Including an affiliate disclosure is an essential task. That every beginner blogger needs to do. Before you start adding affiliate links to your blog posts. And trying to monetize your blog.
Whilst getting your head around the legal requirements of your affiliate disclosures. And policy pages, can be a tricky process. I hope that this WordPress tutorial. Will make the technical side of actually adding them to your blog posts. Super easy and a breeze to do.
After all, there is hopefully a method included here to fit all your blogging needs. Whether you would rather use a WordPress plugin. Edit code or control your affiliate disclosure on a post by post basis.
So, tell me – what’s your preferred method for adding an affiliate disclosure to your blog posts? Are there any types or styles of affiliate disclosures not included here that you’d like to see?
If you found this blog post useful then please consider taking a few seconds to share it to your favorite social media platform!

You’re a genius!!! I have (somewhat of) a computer science background but it never occurred to me to code in my disclosure rather than just copy-pasting a million times. I went with editing the functions.php file to automatically add it to all my posts and I can already tell this will make my life way easier. Thank you so much!
Hey Jay,
I’m glad it could help and simplify things abit!
Hey, thank you so much for sharing this blog post. It helped me with what I needed 🙂
I’m glad it helped! 🙂
Thank you so much for the code. I have been googling my eyes out!