This post contains affiliate links. Which means I will make a commission at no extra cost to you should you click through and make a purchase. Read the full disclosure here.
Feeling swarmed with emails? Tired of finding new emails appearing that you don’t even remember subscribing for? Only to have to scrounge around for the unsubscribe link (if there even is one) and answer some required questions just to submit the request?

With today’s increase in digital activities from watching TV to paying bills, it’s not surprising the huge amount of emails going to people’s mailboxes. What’s even less surprising is companies using every opportunity to send you one just to sell you something.
A lot of unsubscribe buttons seems tucked away at the bottom of emails in the smallest font the designer can get away with. Many marketers want to know why you unsubscribe and often request you to fill in some questions. Annoyingly, some even make the answers required before the unsubscribe request will be processed. They certainly don’t like to make things easy. Do they? Not surprising considering how valuable the information is to them.
But, what if there was a way to declutter all those emails you don’t really want in one simple place, so you can focus on what matters to you?
Well, I can tell you that it’s easily possible. Completely customizable to what you want. And won’t take you ages to set up or maintain either. Find out how below, as I will show you how I did this for my own email sanity. As well as the pros and cons I’ve discovered from using this method.
In rolls, Unroll.me (please excuse my bad punny heading, I just couldn’t help myself XD )
Unroll.me is a very powerful but also very simple email filter that sorts your emails before they even reach your inbox. It is a web-based app so it works with any email account. As well as any current tools you might be using to manage your emails. Best of all it’s completely free!
It works with any email software such as Kiwi or Thunderbird. It could also work with the overlay skin Sortd for Gmail, which I have also covered in detail in another post (if you haven’t seen it yet, I recommend checking it out). So it easily adds onto any custom solutions you might already have set up.
So how does Unroll.me work?
The way it works, is that it monitors the email addresses that come into your inbox. Every email address it discovers it will give you the option of keeping in the inbox, adding to your rollup, or unsubscribing.
![]()
And just in case you’re wondering what ‘rollup’ means. It is a daily email that’s part of Unroll.me which you can schedule for either ‘Morning’, ‘Afternoon’ or ‘Evening’. All the emails you add to your rollup basically get batched up into 1 summary email. You can then go into any individual emails from there.
It saves time & effort
This is a great way in my opinion to remove clutter or emails that may distract you throughout the day when you are trying to be productive doing other things. Like writing content for a blog post 😉 Or you can just use it to manage your emails more quickly. That’s what is so brilliant about this, you can customize it to do things your way.
Everything is quick and simple to manage, you have one-click to set emails to either inbox, unsubscribe or rollup. And that’s it! No double confirming or anything. Why? Because everything you set, you can go back in and change later. Nothing is permanent.
You no longer have to scroll through emails to find the tiny unsubscribe button, if it is even there. Unsubscribing always works unless the sender changes their address. So you no longer have to rely on companies remembering to do it. There’s no more waiting X amount of days either, because the changes apply to Unroll.me almost instantly. And as an extra bonus, no more filling in surveys because the email sender wants to know why you want to unsubscribe.

Here’s how I setup my Unroll.me
Sign up for account
Firstly, we need to sign up for an account. If we head over to unroll.me we should get a ‘Get started now >’ button.

If we click this, there will be a bunch of options for signing in.
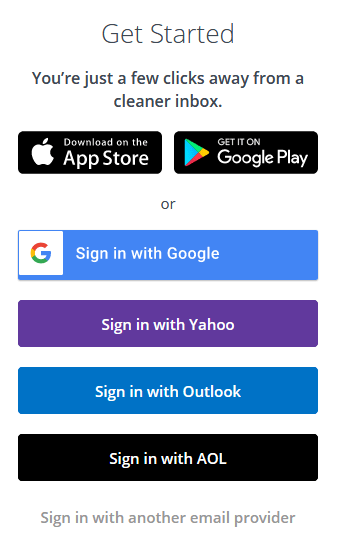
Sign up by selecting your email provider from the list. You’ll need to agree to their Terms of Service and Privacy Policy to be able to continue.

Once you’ve agreed to their terms, you’ll usually be sent to your email providers login screen.
If your provider isn’t on the list above, select the bottom option ‘Sign in with another email provider’.
You’ll need to enter your email and agree to Unroll.me’s Terms of Service and Privacy Policy.

After signing in, you’ll need to allow Unroll.me to manage your emails.

Next you’ll be given an overview of the features. Click on ‘Let’s do it’ and click-through the following screens however you like. It’s brief, I promise. And the information is useful.

Managing Subscriptions
After the overview screens have been completed, Unroll.me will do a scan for subscriptions.

For me it only found 4, since I already have it setup on my own emails. I had to setup another account so I could make sure I had all the details right for anyone signing up from scratch. It wouldn’t be a very complete tutorial otherwise!
Click ‘Start editing!’
This will bring you to the main screen. If Unroll.me ever finds new subscriptions it will always let you know in your rollup email. And bring you back here to manage them.

Here you can see the list of subscriptions that were found. They are sorted alphabetically. With one-click you can set them to either ‘Keep in Inbox’, ‘Unsubscribe’, or ‘Add to Rollup’.
If you have a lot of subscriptions, you can always do some and come back to this screen later. No pressure!
For the sake of this example, I unsubscribed from 2, kept in the inbox 1, and added 1 to my rollup. Remember, you can always change your selections later, as Unroll.me remembers everything.
If you clear everything, you’ll get another screen.

Small note Unroll.me does like to add some adverts to their pages. It’s been some free clothes ‘styling’ thing for a while. But this is how they keep such an awesome service free. Besides, the ads are very unobtrusive.
When you are ready click ‘Continue’.
You’ll get a social media prompt to share a message on Facebook or Twitter. There is an option to ‘Continue without sharing’ though. It does have an elaborate sad face with a tear if you hover over it!
You’ll usually get a summary of what you’ve done with the subscriptions. There should also be the option to select when you’d like to receive the rollup email each day. This is ‘Morning’, ‘Afternoon’ or ‘Evening’ rather than a specific time.
That’s it! Unroll.me will now be filtering your emails.
My Method
I personally unsubscribe from anything I haven’t used in the last 6months. Since I tend to buy in bulk there can be quite a gap between purchases. Anything I don’t recognise, also gets unsubscribed. Keeping important time-conscientious emails in the inbox are a must for me. Things like security alerts, backup notifications or bills. Social media related, product sales or promotional emails tend to get rolled up.
However, I can’t stress enough how you use it is up to you. Everyone has different priorities. And these can even differ depending on the email address you are using, like business vs. personal. So play around with it. And change it up if you feel like it’s not working.
Just a few other side notes
You know how I mentioned Unroll.me remembers everything, and you can change things later if you want? Well, here’s how.
Settings Menu
If you click on your email address in the top right corner, you can select settings. Here you can change the rollup email’s delivery time. It can also be set to a different view. You have the option between grid and list. I personally use the list view so I can skim through the rollup as quickly as possible. Grid is much more visually appealing though. For some reason my list view emails have squished and out of proportion preview images. It’s kinda ugly, but it doesn’t bother me either.

There’s also the option to deactivate your rollup, opt out of ad tracking, and delete your account here.
Edit Subscriptions
Here you can manage any new subscriptions Unroll.me finds. You can also edit your selections for rolling up, unsubscribing or keeping in the inbox. Just in case you ever change your mind.
Your Rollup
From the menu you can also select ‘Your Rollup’. This allows you to look at the current rollup before it’s sent to you. You also can view older rollups from the archive.
Unroll.me means simpler & more time efficient emails
Unroll.me has reduced the amount of emails that are either junk or not useful to me anymore. It has also simplified a lot of my bulk emails so I spend less time reading and sorting. And more time doing other things that are important to me. Or I just have to do because, well, it’s life (paying bills will always sucks.)
I believe everyone should try Unroll.me at least once. It is so simple to set up and customizable to an individual’s needs. Yet I will admit, as much as I love it. There are some things people might not like. And at least one extra thing that I wish it had.
Ok, sounds great. But what can’t it do?
This service doesn’t do everything. I strongly believe Unroll.me is an excellent starting point to significantly trim your inbox by sorting into the 3 main categories. But aside from this is doesn’t fine tune your inbox any further than that.
In fact, one of the main things I think it lacks is the option to have more than 1 rollup email. I think being able to split social media from product selling emails could really give me an extra sorting level. Technically, any email that doesn’t require immediate attention could be rolled up into its own rollup if this was an option. Less time sorting emails, always sounds like a win-win to me.
There is an option in the ‘Your Rollup’ to set emails to a Category but it only affects the rollup when viewing in a web browser. Which kinda defeats the point of having a rollup email in the first place. If anyone knows of any other uses for this, do let me know in the comments!

Also, there may be some concerns security-wise, since Unroll.me basically has access to your emails. I am quite the security paranoid person, and I’ve been using Unroll.me for at least the last year or so. I’ve not had any issues so feel free to consider me your own personal guinea pig for testing any security issues.

Summary – The pros, cons & what to takeaway from this post
Overall, I think getting signed up and setup with Unroll.me is totally worth the little time required (I’d estimate 15mins tops). Unless you have tons of subscriptions or take lots of time deciding what to do with each email. Just go with your gut reaction. You can always change it later remember! Either way, you will be hard pushed to find anything that offers a quicker one-click sort like this.
Especially, when you add in all the unsubscribe benefits of not having to search each email for the unsubscribe button, wait for it to load the web page, complete the questionnaire. And then hope they actually do it for you. With Unroll.me you are in control.
Unroll.me may not be for everyone, but I highly encourage everyone tries it for themselves first. Things like adverts or security issues may put some people off. But as I have mentioned I have been using this myself for over 1year without any issues.
Pros |
Cons |
|
|